Want to turn old items into something useful while reducing waste? Hosting a repurposing workshop can help you do just that. Here’s what you’ll learn:
- Why host one? It reduces waste, saves energy, and strengthens community ties.
- How to plan it: Set clear goals, pick a theme, and find a venue.
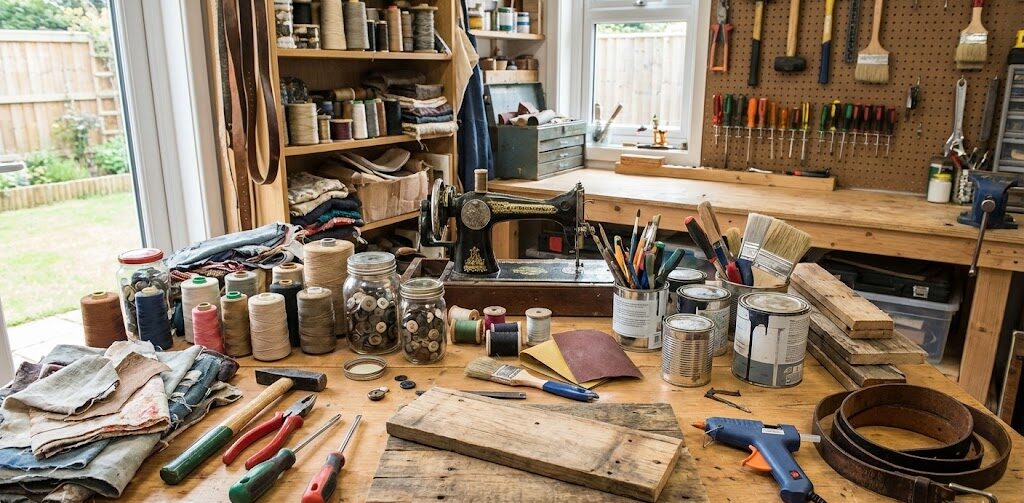
- What you need: Gather secondhand materials (like mason jars, fabric scraps, or furniture) and basic tools (scissors, glue guns, drills).
- How to run it: Organize workstations, ensure safety, and guide participants step-by-step.
- What’s next? Collect feedback, measure results (like diverted waste), and plan future workshops.
Repurposing workshops not only teach practical skills but also bring people together to make a positive impact on the environment. Ready to start? Let’s dive into the details.
Planning Your Workshop
A well-planned workshop is the backbone of any successful repurposing event. Thoughtful preparation ensures everything runs smoothly, from keeping participants engaged to sourcing the right materials. The first step? Set clear goals to guide your planning process.
Setting Goals and Choosing Themes
Start by defining specific, measurable goals. What do you want participants to take away from the workshop? Perhaps you’re aiming to encourage community collaboration, teach practical repurposing techniques, or promote sustainable living. These objectives will shape your agenda, materials, and activities.
Tailor your goals to match your audience. For example, if your workshop is for families, you might focus on transforming old toys into new ones. College students? Highlight creative ways to upcycle furniture for dorms. For seniors, you could teach simple but rewarding crafts using repurposed materials. The key is to align your plans with their interests and skill levels.
Avoid vague goals like “teach repurposing.” Instead, aim for something concrete, such as “guide participants in creating three functional items from discarded materials” or “demonstrate five upcycling techniques for old clothing.” These clear goals not only keep you focused but also set expectations for your attendees.
Themes are another important consideration. Choose ones that resonate with your objectives and audience. Popular options include seasonal decorating, turning discarded items into functional pieces, or textile upcycling. A mix of beginner and experienced participants can also enhance the experience, as natural mentoring often occurs in such settings.
Creating a Budget and Finding a Venue
A solid budget is essential for a smooth workshop. Start by identifying your main costs – staffing and venue rentals are usually the biggest. Always include a contingency fund, ideally up to 25%, to cover unexpected expenses.
When choosing a venue, prioritize spaces with good lighting, accessible outlets, and easy-to-clean surfaces. Community centers, school art rooms, or maker spaces often work well. Visit potential venues during the time of day your workshop will take place to check for practical details like parking, flow, and lighting.
Think about the logistics, too. Does the venue have enough wall space for showcasing finished projects? Is there storage for materials? What about access to running water for cleanup? Make sure the space comfortably fits your expected number of attendees, with enough room for everyone to work without feeling cramped.
Book your venue early to lock in better rates, and carefully review contracts. Pay close attention to deposit requirements, cancellation policies, and any liability insurance needs – especially if your workshop involves tools or messy activities.
Once your budget and venue are sorted, consider expanding your resources through local partnerships.
Working with Local Organizations
Partnering with local organizations can significantly enhance your workshop. Groups like Red Racks Thrift Stores, which operates 12 locations across Missouri, are great allies for repurposing events. They can provide donated materials for projects while also connecting you to the community.
Look for organizations that serve your target audience and share your commitment to sustainability. Thrift stores, environmental groups, maker spaces, and community centers are all excellent options. These partnerships can offer more than just materials – they might also provide funding, expertise, or promotional support.
Formalize these collaborations through memorandums of understanding (MOUs) to outline shared goals, responsibilities, and contributions. For instance, a thrift store might supply materials at a discount, promote your workshop to their customers, and even provide event space. In return, you could highlight their mission and encourage attendees to donate items after the workshop.
Don’t forget to acknowledge your partners in your marketing materials, social media posts, and presentations. Assign specific representatives to maintain regular communication and ensure the partnership stays on track. Beyond material support, think creatively – maybe host a pre-workshop event where participants pick items to transform or organize follow-up sessions for ongoing learning.
Strong partnerships thrive on open communication and mutual respect. Regular check-ins and clear collaboration keep everyone aligned and ensure the relationship benefits both sides.
Getting Materials and Tools
Once you’ve planned your workshop, the next step is gathering the right materials and tools to bring your ideas to life. Having a variety of quality supplies and organized tools will make the creative process smoother and more enjoyable.
Items to Repurpose
When selecting materials, aim for items that are versatile and easy to work with. For example, mason jars are a favorite for many projects – they can be transformed into storage containers or decorative lighting. Wooden crates and pallets are great for furniture projects, while fabric scraps are perfect for textile-based upcycling.
Think about the skill levels of your participants, too. Old picture frames are excellent for beginners since they can be turned into serving trays, chalkboards, or jewelry organizers with minimal effort. For simple projects, tin cans and glass bottles work well as planters or candle holders.
For participants with more experience, include items like small furniture pieces – stools, side tables, or wooden chairs. These allow for more intricate projects, such as reupholstering, painting, or structural changes.
Make sure the materials you choose are clean and safe to handle. Avoid anything with sharp edges, toxic substances, or items that require specialized skills to manage. Also, keep your workshop’s timeframe in mind – pick materials that don’t need excessive prep work or long drying times.
Once your materials are ready, it’s time to organize your tools and safety gear.
Tools and Safety Equipment
A well-equipped workshop needs a mix of basic hand tools and some power tools. Start with essentials like scissors, craft knives, and cutting mats for cutting tasks. Glue guns, wood glue, and strong adhesives are must-haves for assembly. For more advanced projects, include cordless drills, sanders, and jigsaws.
Safety is just as important as creativity. Provide safety goggles for cutting or drilling, work gloves to protect hands from sharp edges or splinters, and dust masks for sanding or working with dusty materials. Keep a first aid kit on hand, and make sure at least one workshop leader is trained in basic first aid.
To keep things running smoothly, organize your tools. Use pegboards or wall-mounted racks to store frequently used items, and set up labeled stations for tools and materials. If you’re using cordless tools, create a dedicated charging area. Encourage participants to follow a clean workbench policy by returning tools to their designated spots after use – this prevents loss and keeps the workspace safe. For pricier tools like drills or jigsaws, consider a tool checkout system where participants sign out and return items.
With tools and safety gear in place, the next step is sourcing your materials.
Where to Find Materials
Finding materials doesn’t have to be expensive. Thrift stores like Red Racks Thrift Stores are fantastic for discovering items to repurpose.
Creative reuse centers are another excellent option. For instance, Remainders Creative Reuse in Pasadena, California, diverts over 10,000 pounds of usable materials from landfills every month through donations from households and businesses.
Habitat for Humanity ReStores are perfect for finding furniture and building materials. As they describe:
“ReStores accept donations and sell a constantly changing inventory of diverse, high-quality merchandise to the public at a fraction of the retail price, while diverting reusable household items like used furniture and building materials from area landfills.”
You can also organize community donation drives to gather materials for your workshop. Use social media, community boards, or partnerships with local groups to spread the word. Be specific about what you need – for example, asking for “mason jars and wooden crates” often gets better results than a general request.
Building business partnerships can also be a great way to source materials. Local furniture stores, craft shops, or manufacturers might be willing to donate items they no longer need. This not only supports your workshop but also helps reduce waste in the community.
Before accepting any donations, make sure to review the guidelines to ensure the materials meet your safety and quality standards. Set up a sorting system to keep everything organized and ready for use.
Running Your Workshop
With your materials ready and tools in place, it’s time to bring your repurposing workshop to life. Success hinges on creating an organized workspace, keeping participants engaged, and prioritizing safety every step of the way.
Setting Up Work Areas
Clear out unnecessary clutter to create well-organized zones for different tasks. Designate specific areas for activities like assembly, painting, electrical work, and final touches. Keeping these tasks separate helps streamline the process and avoids confusion.
Place tools and supplies where they’re needed most. For instance, keep paintbrushes, drop cloths, and paints at the painting station, while drills, screws, and other hardware should be available near the assembly zone. Frequently used items like scissors, glue guns, and measuring tapes should always be within easy reach. Use labels for storage bins and tool stations to keep everything easy to find. Also, make sure pathways between zones are clear and safe, allowing participants to move freely without obstacles.
Once your workspace is set up, shift your attention to guiding participants through the hands-on projects.
Leading Hands-On Projects
Effectively leading a workshop means balancing structure with creativity. Break each project into three parts: a clear explanation, hands-on practice, and a wrap-up discussion. This approach ensures participants stay engaged and understand each step.
Plan for regular breaks – about 15 minutes every 90 minutes – to keep energy levels up. Encourage participants to stretch or even check out other projects during these pauses. Small group work can also boost collaboration, allowing beginners to learn from more experienced participants. Tackle complex projects by breaking them into smaller steps, such as starting with disassembly and cleaning, then moving to design planning, and finally diving into the actual repurposing. Walk around the workspace to offer one-on-one guidance and adjust your approach if certain techniques seem to be causing frustration.
While fostering creativity is important, maintaining a safe environment is non-negotiable.
Keeping Everyone Safe
Safety should be front and center throughout your workshop. Start by outlining clear safety rules and ensuring everyone understands them before they begin handling tools or materials. A simple dress code can minimize risks – participants should avoid loose clothing or jewelry, tie back long hair, and wear safety glasses or other protective gear as needed.
Keep the workspace tidy, with cords secured to prevent tripping hazards. When power tools are involved, demonstrate their proper use, including the right grip and stance. Regularly check tools to ensure they’re sharp and functioning correctly, as dull tools can be hazardous.
Additional precautions include using push sticks or similar tools to keep hands away from saw blades and inspecting materials for hidden dangers like nails or weak spots. Have emergency supplies – like first aid kits and fire extinguishers – easily accessible, and ensure at least one leader has basic first aid knowledge. Be mindful of electrical safety by using extension cords properly, grounding tools, and turning off equipment before making adjustments. Hold quick safety briefings before introducing new tools or techniques, and encourage participants to report any potential hazards immediately.
Measuring Results and Next Steps
Once your workshop wraps up, it’s time to assess its impact and lay the groundwork for future sessions. This involves gathering feedback, engaging with your community, and carefully planning the next steps to keep the momentum going.
Getting Feedback and Recording Results
Feedback is essential for improving your workshops. Start collecting it right after participants complete their projects – while the experience is still fresh in their minds.
A short survey (around 5–7 minutes) works well for gathering insights. Include a mix of question types to get both measurable data and qualitative feedback. For example:
- Confidence scales: Ask participants to rate their comfort with repurposing techniques before and after the workshop.
- Multiple-choice questions: Find out which projects they enjoyed the most.
- Ranking questions: Let them prioritize topics for future sessions.
To encourage honest responses, make the survey anonymous. Keep it simple with a thank-you note and a promise of confidentiality. You can also ask general questions about the workshop setup, like how effective the stations were or how safe they felt during the activities.
Track the environmental impact of the workshop too. Count the number of items repurposed, measure the weight of diverted materials, and document the variety of items participants worked on. A tracking sheet can help you organize this data and make it easier to share with your community or potential sponsors.
To measure long-term impact, follow up with participants 30, 60, and 90 days after the workshop. Ask if they’ve continued repurposing at home, shared their new skills with others, or even changed their shopping habits. For example, the Software Sustainability Institute found that participant confidence levels increased significantly when comparing pre-workshop registrations to post-event feedback.
Another quick way to gauge immediate value is by using a Return on Time Invested (ROTI) activity. Ask participants to rate whether the workshop was worth their time. This simple exercise provides instant feedback and highlights areas for improvement.
Use all the data you collect to showcase your workshop’s success. This not only strengthens ties with your community but also helps you plan better for future events.
Sharing Your Success
Sharing your results is key to building excitement and support for upcoming workshops. Highlight your impact with compelling statistics, participant stories, and visuals.
Create a visual impact report that includes before-and-after photos of repurposed items, testimonials from participants, and key metrics. For instance, you could show how much material was saved from landfills and transformed into functional household goods.
Social media is a great platform for this. Share individual success stories with photos of participants and their creations (with their permission). Include short quotes about their experiences to make the posts more personal and engaging. Local newspapers and community newsletters also love feel-good stories, especially when paired with strong visuals and data about the local impact.
Collaborate with local organizations to amplify your message. For example, Red Racks Thrift Stores align perfectly with repurposing goals since they recycle unsold items and support the local community. Partnering with groups like this reinforces your mission and helps spread the word.
You can also present your results at local meetings or events. A short presentation highlighting participant feedback, environmental benefits, and community impact can lead to new opportunities – like venue donations, material sponsorships, or volunteer sign-ups for future workshops.
Planning More Workshops
Use the feedback and insights you’ve gathered to plan and refine your next workshops. Participant input can guide your themes and help you tackle any logistical challenges.
Timing your workshops to match seasonal trends can make a big difference. For example:
- Host furniture restoration sessions in the spring, when people are decluttering.
- Plan holiday decoration repurposing workshops in early November.
- Offer garden container projects before planting season.
These seasonal themes align with community needs and often make materials easier to source.
Building partnerships with local organizations ensures a steady supply of materials and venues. For instance, Red Racks Thrift Stores, with their veteran-owned mission supporting Disabled American Veterans, can be a reliable partner for donated items. Their commitment to community service ties in seamlessly with the goals of repurposing workshops.
Instead of standalone events, consider creating a series of workshops. Quarterly sessions with increasing skill levels – starting with simple projects like decorative containers and progressing to complex furniture restoration – can help you build a loyal group of participants over time.
“Every participant appreciates the follow-up after a workshop. It shows that you genuinely care about their personal development and want to support their continuing growth.” – Candice Lam, Transformation Leader
To keep the momentum going, establish a network for past participants. Use email lists or social media groups where they can share projects, ask questions, and invite friends to future events. This kind of community can become one of your strongest marketing tools while also providing ongoing support for skill-building.
Specialized workshops can also be a great way to respond to participant interests. If you notice a trend – like interest in electronics repair or textile upcycling – design sessions around those topics. Partner with local experts to bring in specialized knowledge and make these workshops even more engaging.
Finally, track your long-term impact. Monitor repeat attendance, volunteer recruitment from past participants, and spin-off initiatives like repair cafes or school programs. These metrics demonstrate sustained engagement and can help you secure funding or sponsorships for larger projects.
Document what you learn after each workshop. Note which projects were the most popular, which safety measures worked best, and how different venue setups affected the flow of activities. This kind of reflection will make planning future workshops smoother and more effective.
Conclusion
Hosting a repurposing workshop brings together practical planning and community involvement to support meaningful waste reduction. The process is simple: pick a venue and topic, gather the necessary tools and materials, design engaging hands-on activities, and follow up with attendees to assess the workshop’s impact. These steps naturally build on earlier planning and execution efforts.
The planning stage lays the groundwork. Topics like “Zero Waste 101“ or DIY furniture restoration give participants actionable insights and reinforce the workshop’s focus on sustainability.
During the event, your role as a facilitator is key. Successful workshops prioritize connection – being present, pacing yourself, and staying mindful of your energy can create a more engaging experience for everyone.
“Sharing what you know with others is a great way to take it a step further! Hosting a zero waste workshop is a fun, interactive way to do this. This is a great way to build community and get people thinking about the waste they create.”– Ariana Storniolo, Founder of Greenify-Me
Workshops like these not only teach practical skills but also address larger environmental issues, helping build a more eco-conscious community.
By collaborating with local organizations, the benefits of your workshop can extend well beyond individual projects. For example, partnering with groups like Red Racks Thrift Stores – which supports community recycling and Disabled American Veterans – can strengthen the local sustainability network while ensuring access to repurposing materials.
“Upcycling is more than just a creative approach to waste reduction; it is a real catalyst for positive social change. By embracing upcycling initiatives, local communities can unlock economic potential, foster environmental consciousness, and strengthen social bonds, creating a lasting impact on both their own well-being and the broader economy.”– Gifted Platform
Collecting participant feedback after each session is essential for refining future workshops and measuring both environmental and educational outcomes.
Perfection isn’t the goal from the start. Focus on creating an engaging experience that contributes to waste reduction and community building. As one facilitator put it:
“There is something magical about gathering with other human beings, being in the presence of an inspired facilitator, and sharing insights with fellow participants: if you are passionate about building community and bringing people together, consider learning the skills needed to plan and host your own events and workshops.”– aurora, Repurpose your Purpose
Your community is ready to embrace this initiative. Pick your topic, secure a venue, and start making an impact – one repurposed item at a time.
FAQs
What are some fun and creative themes for a repurposing workshop to attract a wide audience?
To make your repurposing workshop stand out and draw in a diverse group of participants, consider selecting themes that ignite curiosity and encourage hands-on creativity. For instance, “Upcycled Fashion” could invite attendees to breathe new life into old clothes, turning them into stylish, personalized pieces. Another engaging idea is “DIY Garden Décor,” where participants can craft unique planters or outdoor art using recycled materials. If families are your focus, a theme like “Creative Kids Crafts” can offer simple, enjoyable projects using everyday items like cardboard or plastic bottles. These themes not only spark imagination but also emphasize the value of reusing materials, making your workshop both fun and impactful for everyone involved.
How can I measure the environmental impact of my repurposing workshop effectively?
To assess how your repurposing workshop contributes to sustainability, focus on a few critical areas: waste reduction, material reuse, and energy savings. Keep track of how much waste is kept out of landfills and estimate the reduction in carbon emissions by reusing materials instead of purchasing new ones. These measurements can provide tangible proof of your workshop’s impact.
You could also collect feedback from participants using surveys. This can help you understand how the workshop has influenced their awareness and encouraged sustainable habits. Such insights not only reveal the immediate effects but also shed light on the potential for long-term environmental improvements. Together, these data points create a comprehensive view of your workshop’s role in promoting sustainability.
What safety tips should I follow when using power tools during a repurposing workshop?
To make your repurposing workshop both safe and enjoyable, especially when power tools are involved, keep these key safety practices in mind:
- Suit up with safety gear: Protect yourself by wearing safety glasses, gloves, and hearing protection. These essentials shield you from debris and loud noises.
- Check your tools: Before diving in, inspect all tools for damage or defects. Make sure safety guards are intact and working properly.
- Stay organized: A tidy workspace minimizes the chance of accidents. Keep cords tucked away from sharp edges and clear of walkways to avoid tripping.
- Use tools the right way: Follow the manufacturer’s instructions carefully, always use the correct tool for the job, and unplug equipment when it’s not in use.
Focusing on safety ensures a smooth and secure experience for everyone involved.


